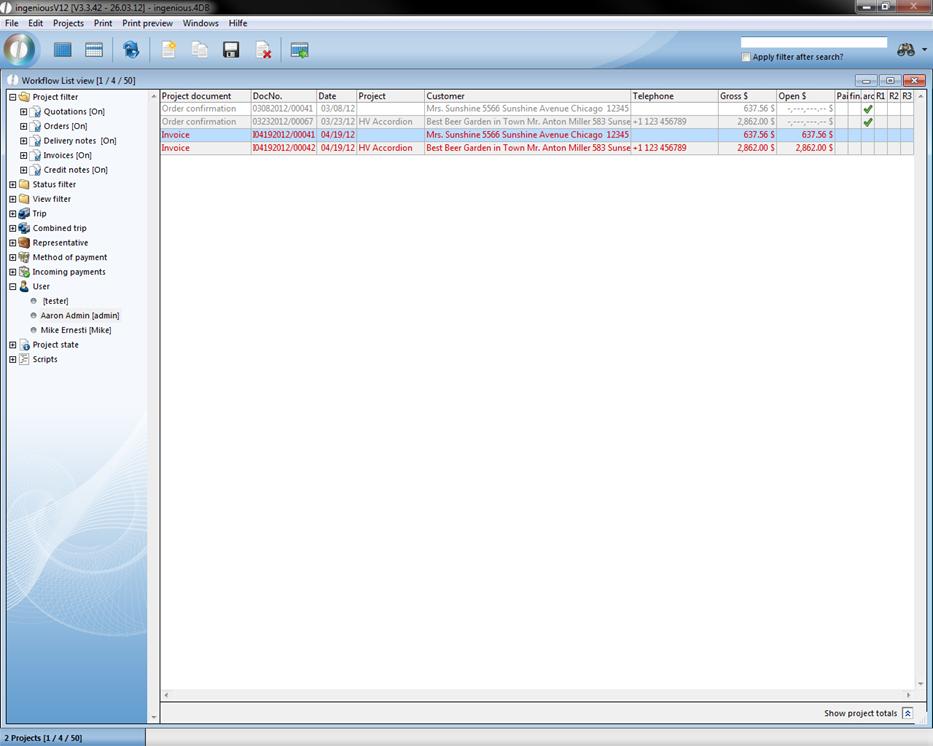
In the workflow list views, you will find different print lists under the “Print” menu item that correspond to the user rights of the single areas. These lists take into consideration all projects that were selected with the filter function and possibly also by marking. Ingenious.V12 delivers a huge number of prefabricated lists that can be adapted and expanded according to your needs.
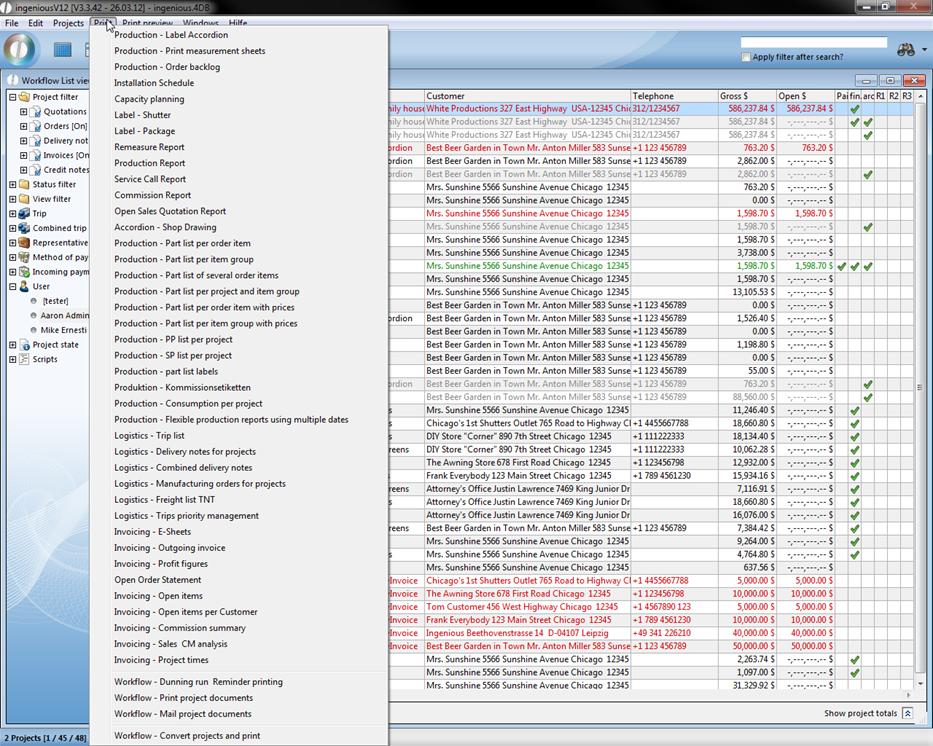
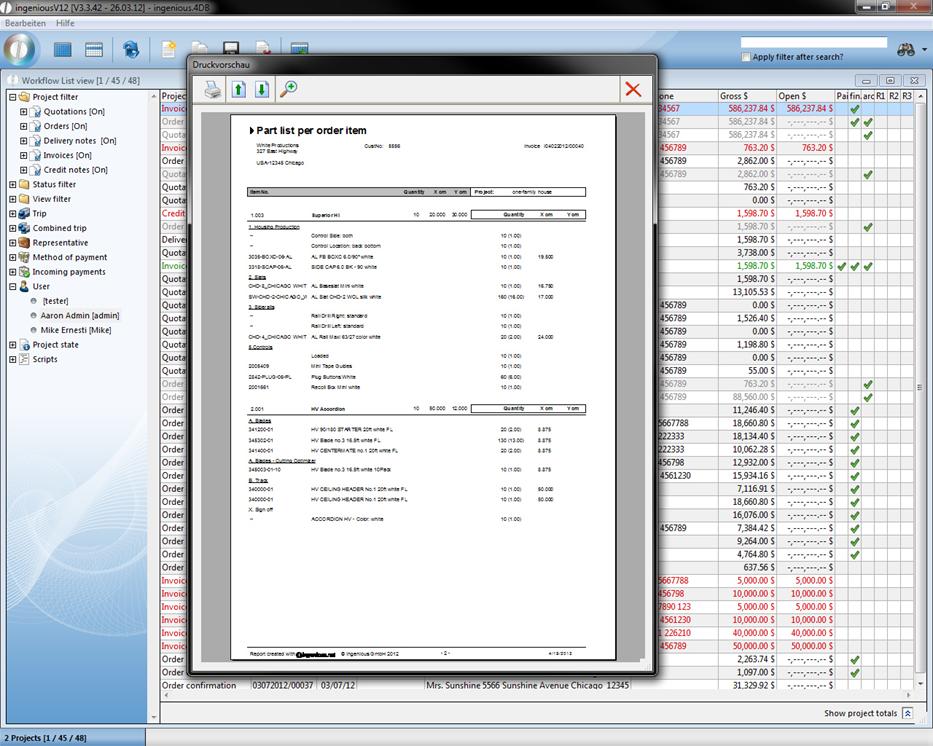
You can print several documents of the list view at the same time. Highlight the records to be printed and choose the desired print list. Now in the print dialog window that appears, highlight “All selected” or in order to print all documents of the list, select “All called”. All desired documents are sent to the standard printer. In order to look at the document in the page view before printing, select the “Print preview” field in the print dialog window. You can scroll through the pages with the help of the arrows and you can zoom in on the document with the magnifying glass. Finally you print the document by clicking on the printer icon ![]() . If the document does not correspond to your expectations, you can cancel by clicking on the cross in print job. With quick printing, the positions are given in the ASCII format. The integrated word processing is available to you in the detailed view of the project documents for individual formatting.
. If the document does not correspond to your expectations, you can cancel by clicking on the cross in print job. With quick printing, the positions are given in the ASCII format. The integrated word processing is available to you in the detailed view of the project documents for individual formatting.
Printing and forwarding purchase orders
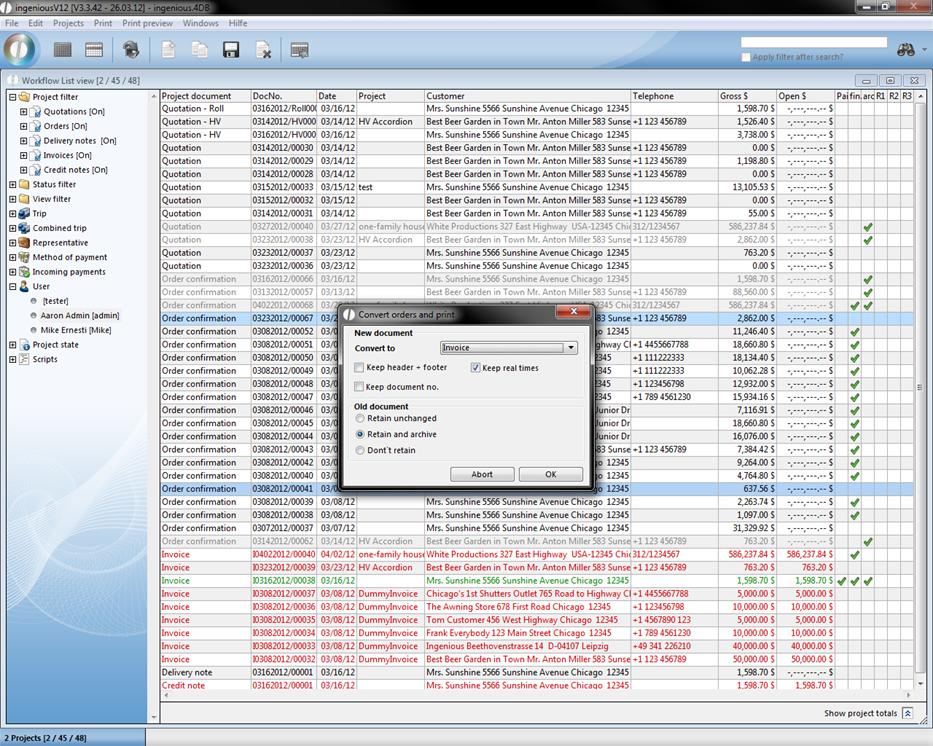
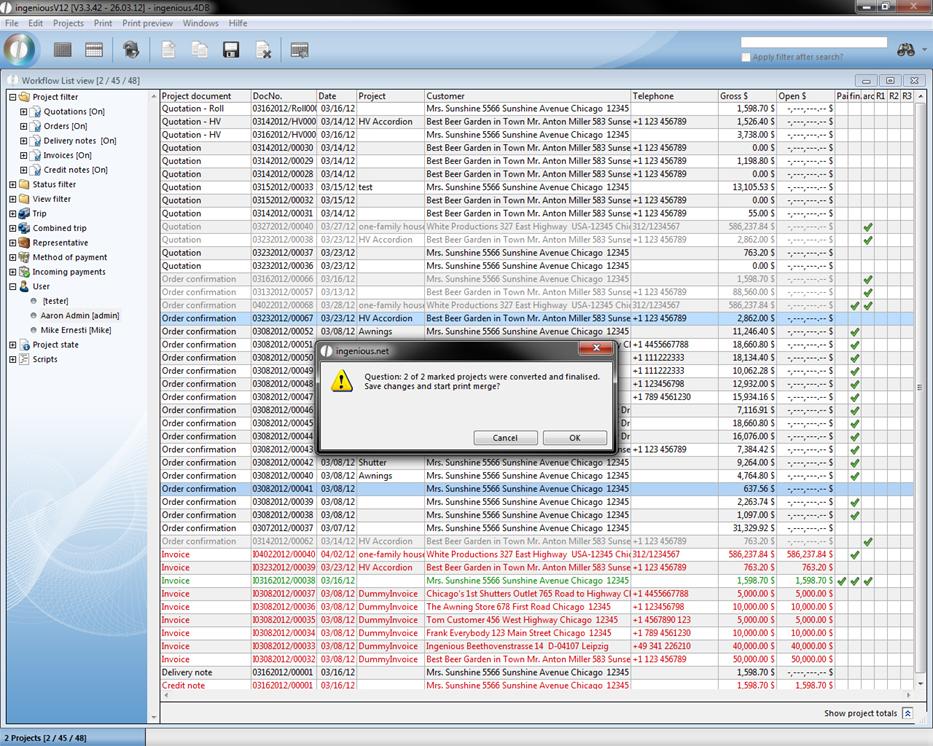
The function „menu: print/workflow – convert and print order“ allows you to create invoices for multiple orders at the same time, to print them and to finalise the project, without opening and converting every single project. You only have to assure that every order is finalised and the relating contact is not disabled. The orders just will be marked and the print function accessed.
Capacity planning
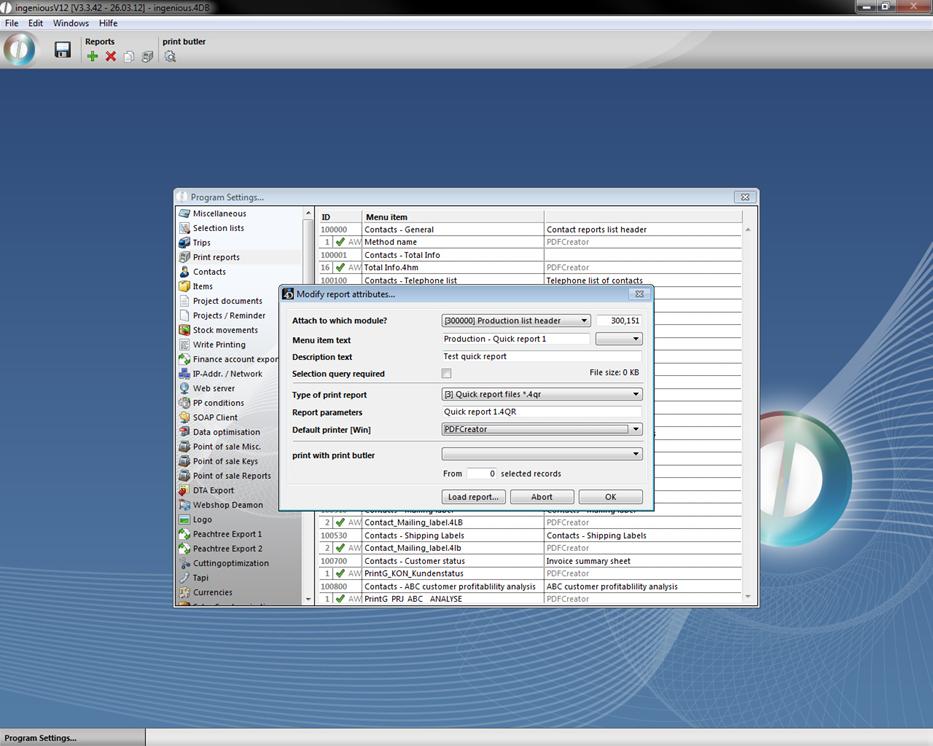
The capacity planning finds an application in production companies. With the help of this function, the companies can coordinate production and marketing of their parts list. To be able to use the capacity planning function, a new print report must be created. Attach this report to the module “[300000] Production list header” and fill in the remaining fields as illustrated.
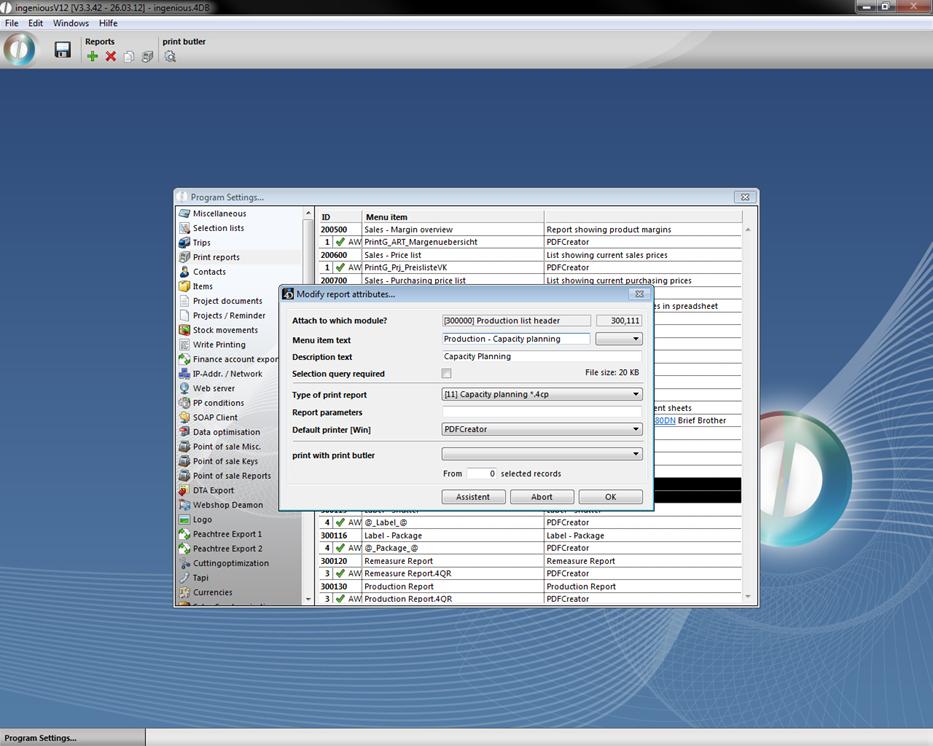
Then click on the “Assistant” button. A new window opens in which you enter the diverse parts list items that need to be considered in capacity planning. In order to do that, simply click on the ![]() button and the item catalog opens, in which you select the designated items by double-clicking. In the “Max. Capacity” column, enter the value of the number of items that are to be produced daily. In the column “Before capacity utilization” enter the value for the item quantities that indicates that the maximum production has almost been reached. In the column “Unit” enter the price of the item (0 = piece, 1 = m, 2 = square meter). The capacity planning report will be attached to a certain project document, preferably to the order confirmation or to the delivery receipt) and to a precise date. In the area “General settings” you can also determine the headline and font size of the print report. Records with appointment connection, „Production finished“(= real date of production; project is no longer displayed at cutting optimization) and “Planned delivery date” (= If the delivery date is exceeded by moving the project in the cutting optimization, an alert will be displayed).
button and the item catalog opens, in which you select the designated items by double-clicking. In the “Max. Capacity” column, enter the value of the number of items that are to be produced daily. In the column “Before capacity utilization” enter the value for the item quantities that indicates that the maximum production has almost been reached. In the column “Unit” enter the price of the item (0 = piece, 1 = m, 2 = square meter). The capacity planning report will be attached to a certain project document, preferably to the order confirmation or to the delivery receipt) and to a precise date. In the area “General settings” you can also determine the headline and font size of the print report. Records with appointment connection, „Production finished“(= real date of production; project is no longer displayed at cutting optimization) and “Planned delivery date” (= If the delivery date is exceeded by moving the project in the cutting optimization, an alert will be displayed).

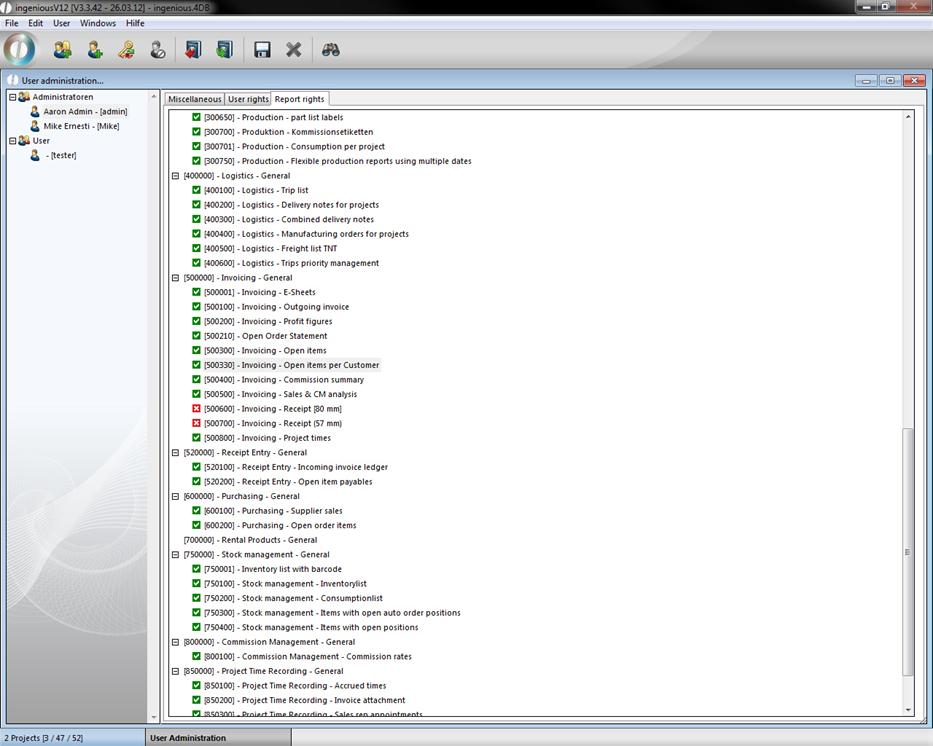
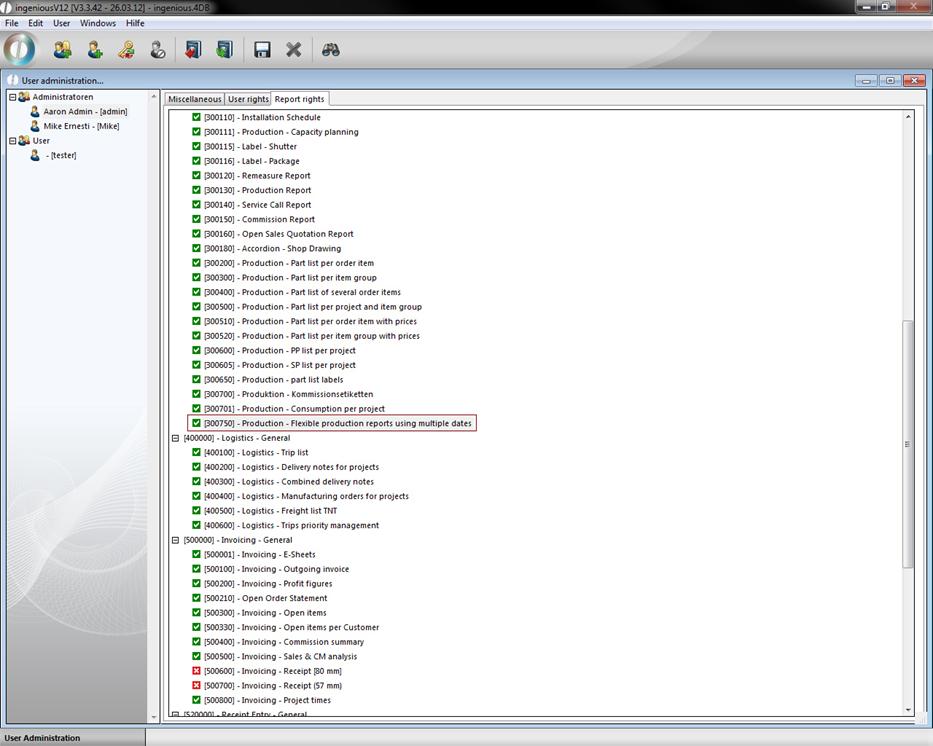
When you have made all of the desired settings, close the assistant and the program settings with ![]() . Don’t forget to save the settings first. In order to use the capacity planning to the fullest, the respective report right must be activated in the user administration.
. Don’t forget to save the settings first. In order to use the capacity planning to the fullest, the respective report right must be activated in the user administration.

When you create a project, make sure that you determine the selected attached dates. Without these settings, the items will not be considered by the capacity planning. For the example shown as well as a better understanding, two order confirmations will be created that have the same dates.
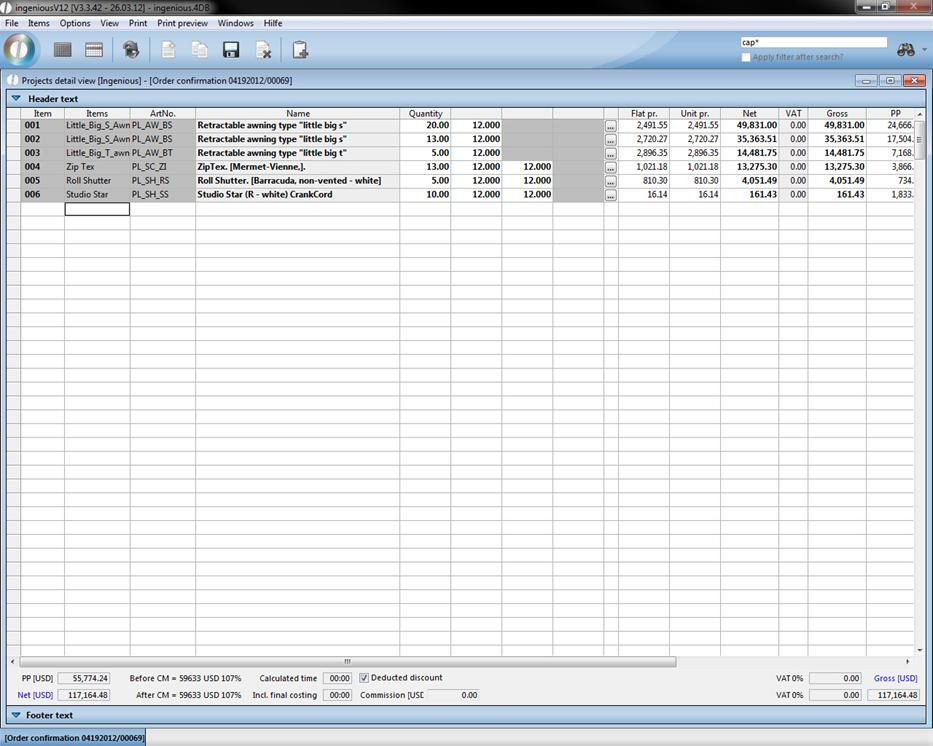
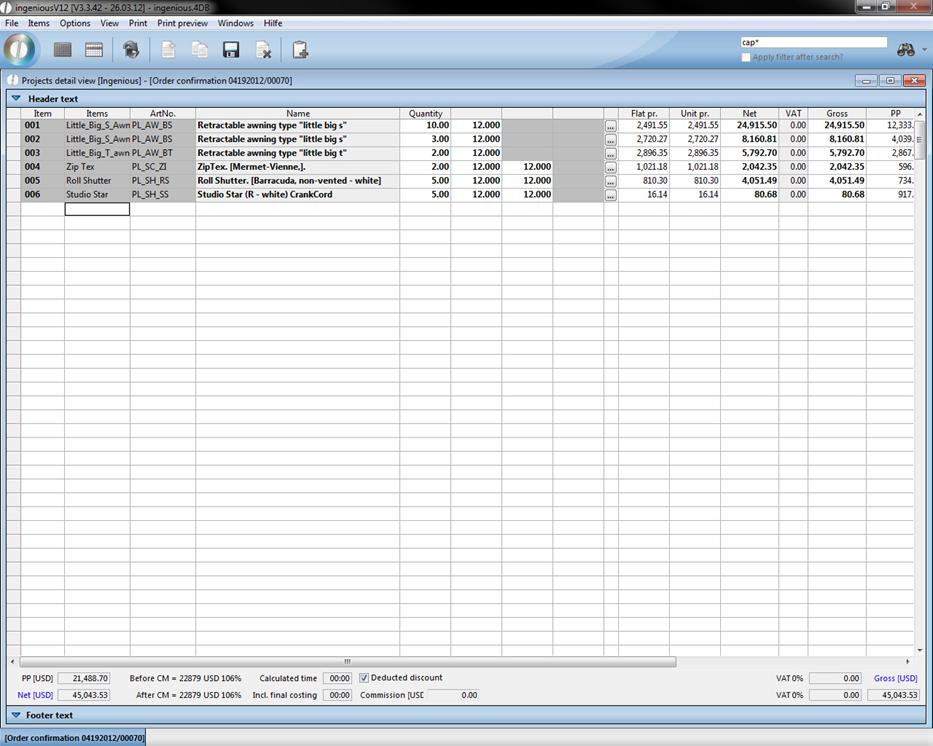
Sample view of the first order confirmation
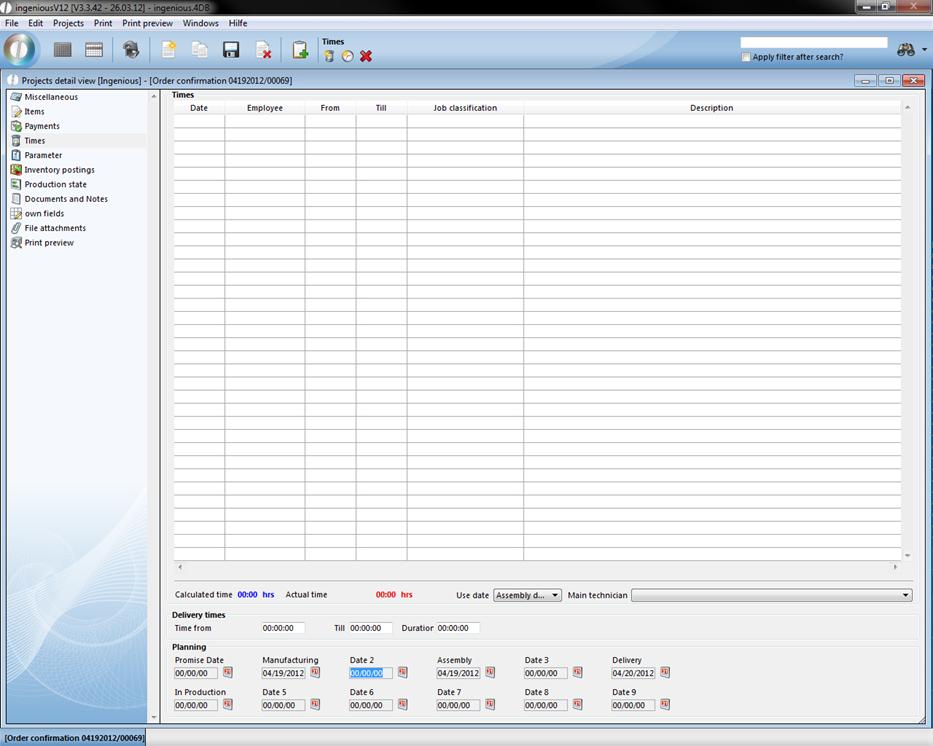
Fixed dates
Sample view of the second order confirmation
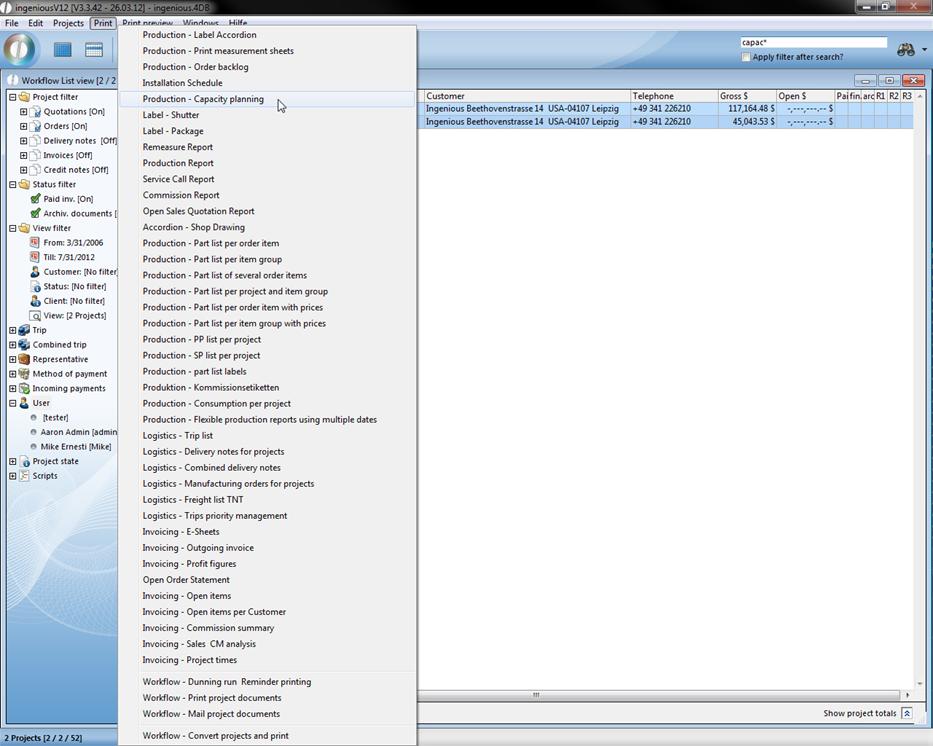
When opening one of the workflow modules, you can access the print report created by you in the “Print” menu.
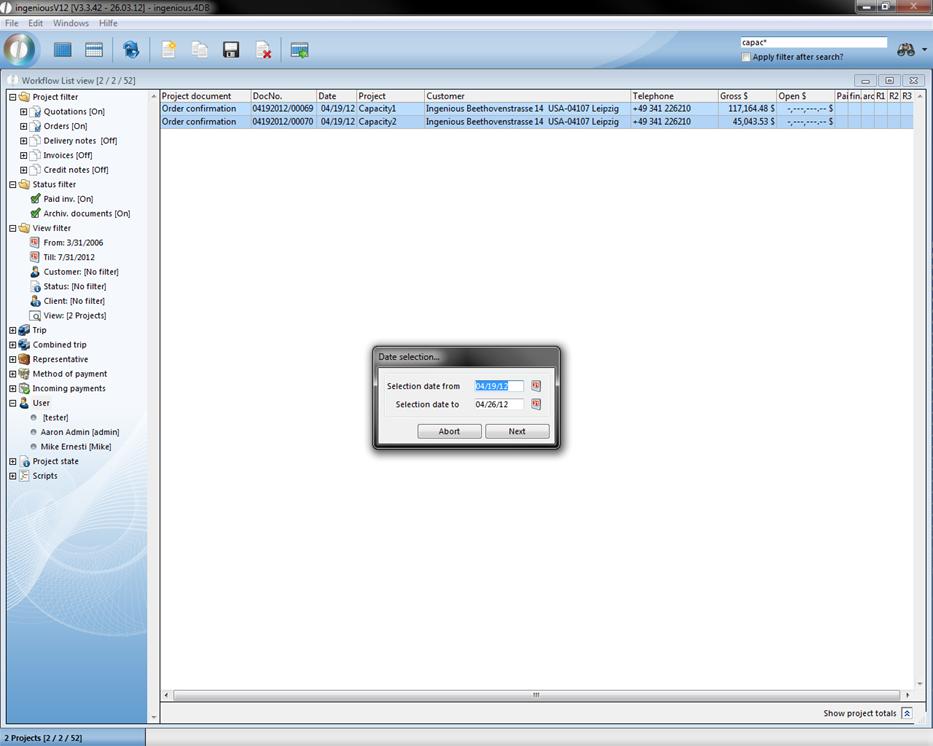
The window for date selection opens in which you can determine the relevant period in which the capacity planning should be shown.
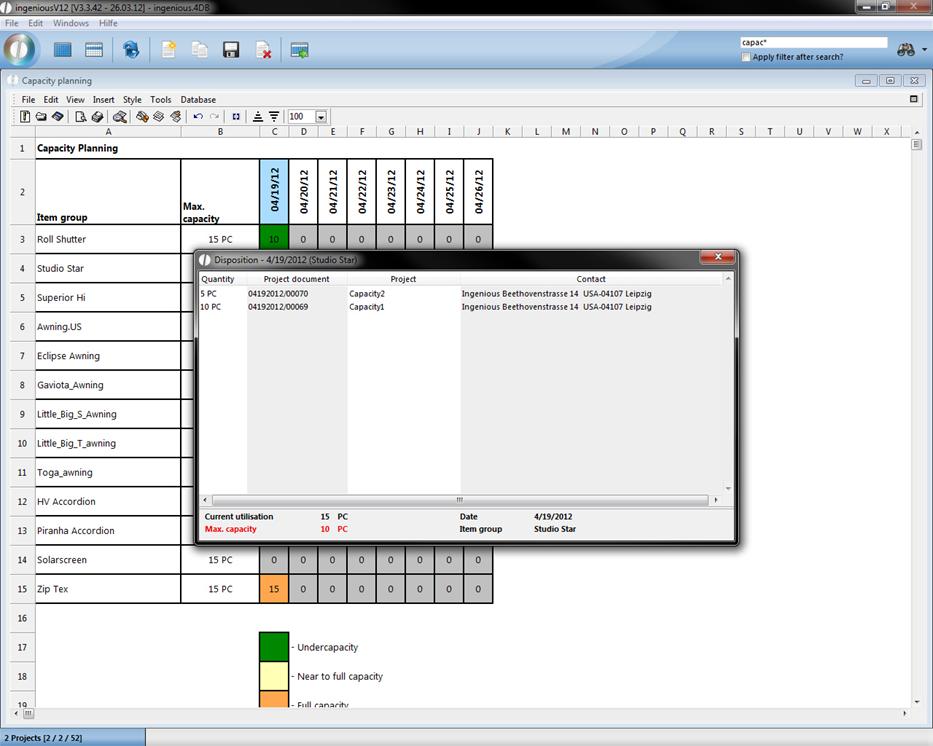
Now you see the capacity distribution. By means of the color marking, you can identify the full capacity of the items (green = free capacity, yellow = prior to full loading, orange = full load, red = overload). Products, for which the production was not finished at departed appointments, are display red at cutting optimization.
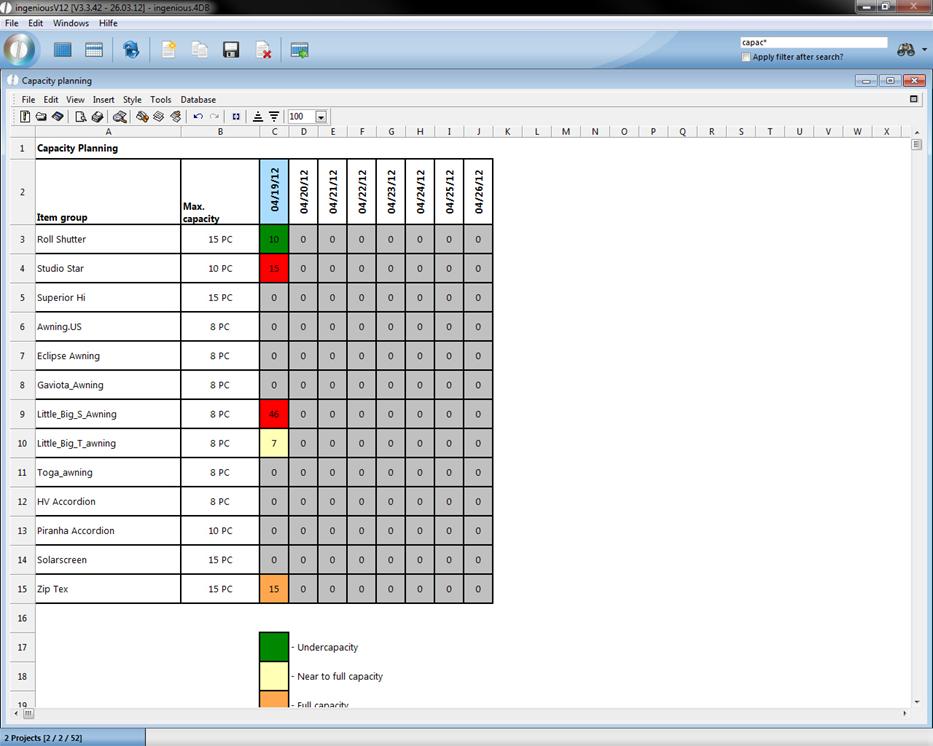
By double-clicking on the individual fields, the relevant arrangement will be indicated which contain product quantity, project number and contact data. In the lower part, you see the item group, the date and the actual and maximum possible loading capacity. In the example illustrated, the actual capacity is greater than the maximum capacity.
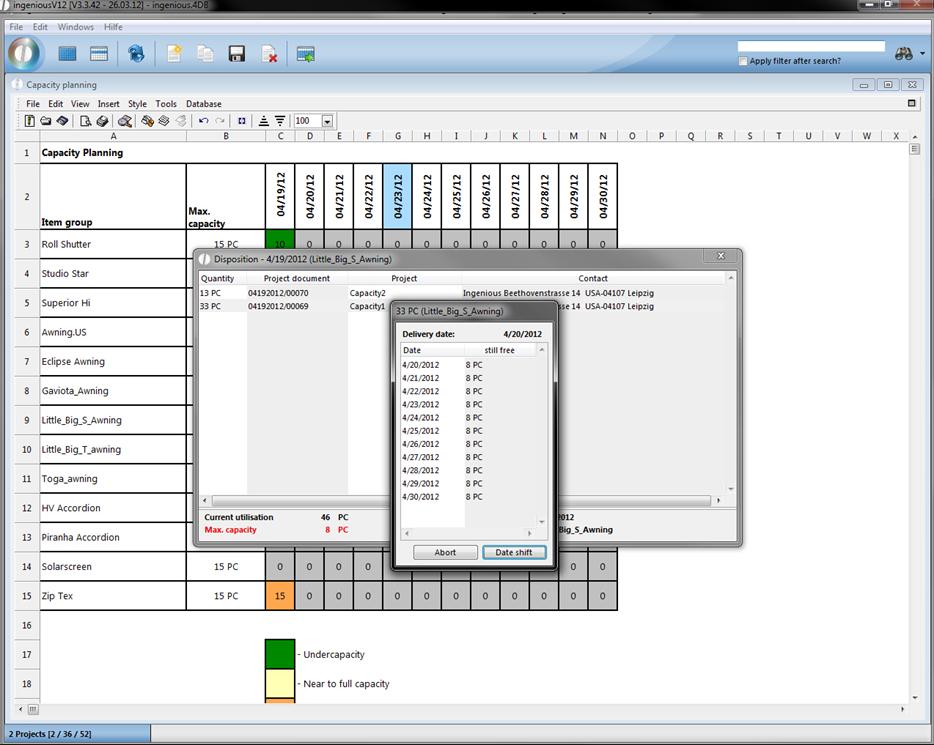
At this point one can double click on one of the contacts to open another window that displays the remaining days inclusive of their capacity load. By selecting one of the days and clicking on the “Date shift” button, the settings of all item positions of a project will be moved to this day and the display of the capacity division changed. Modification of the production date will be automatically entered in the relevant project.
Note: The shift affects all the item items of a project. The shifting of individual items is only possible if they are assigned to a different project (Delivery notice / Order confirmation).
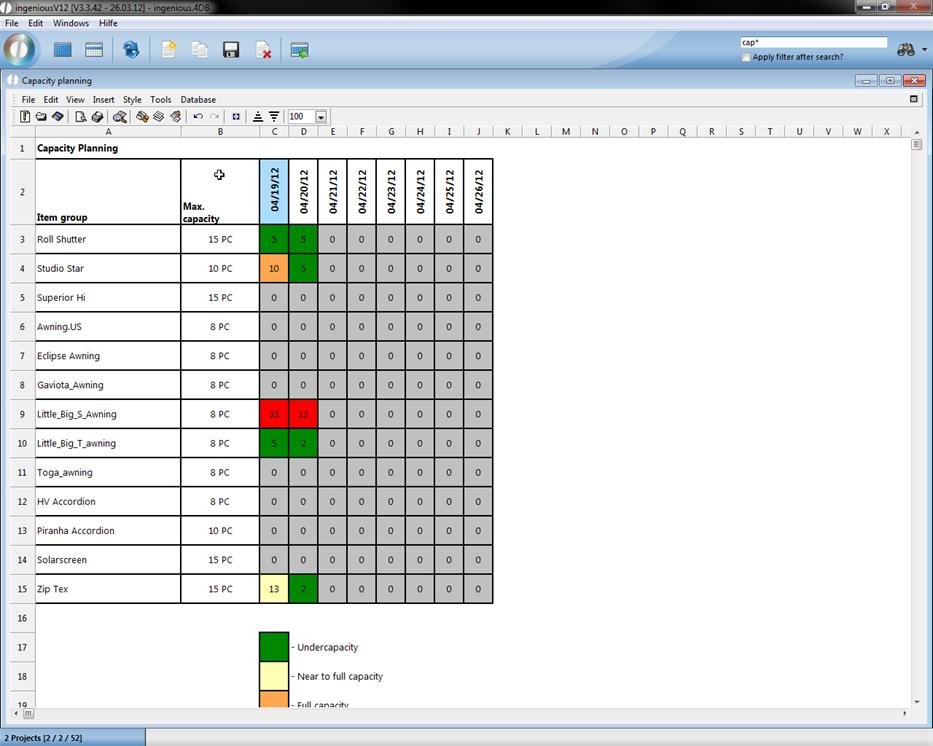
View of the capacity distribution after the date shift
Optionally, the maximum available capacities can also be calculated on a daily basis using the actual resources available. Details can be found in the chapter Extended capacity planning.
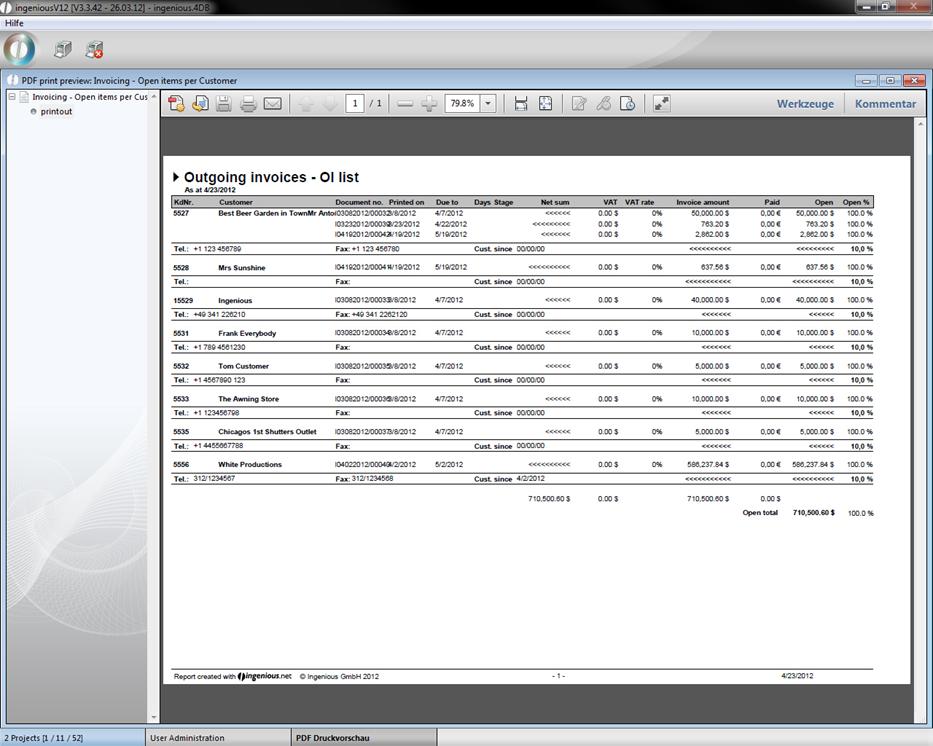
Print report “Invoicing – Open items per contact”
In ingenious.V12 the print report “Invoicing – Open items per contact” was created. To use it, the corresponding report right has to be activated.
Now you can open the print report in the workflow modules in the menu “Print”.

The printing dialog will open up, where you can change the settings. In the print preview you can see a list of all open items and credit notes, sorted by contact.
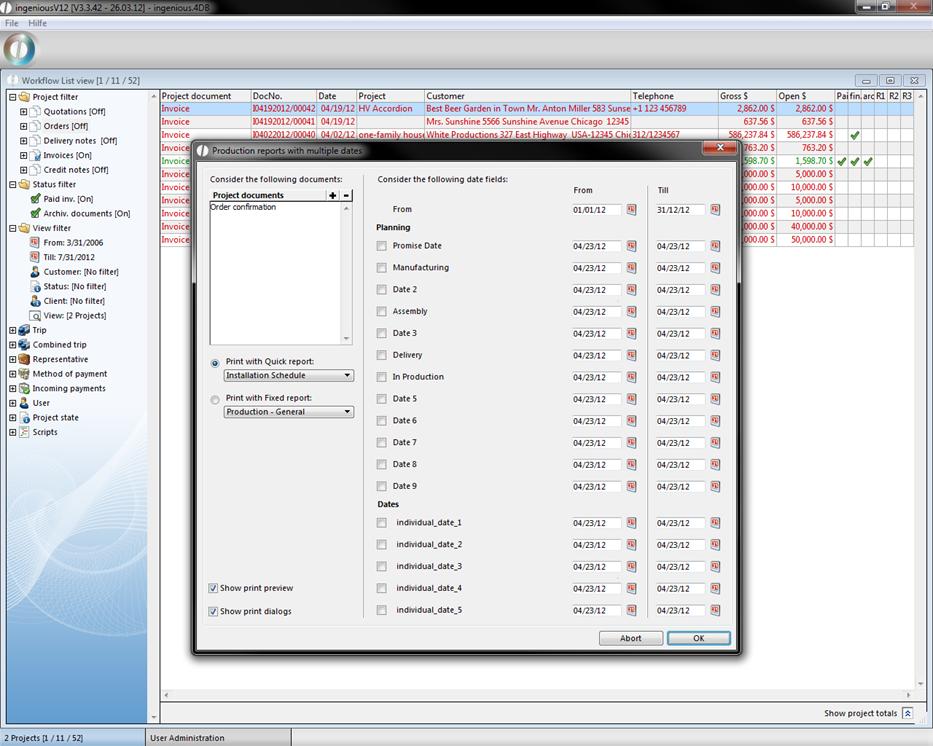
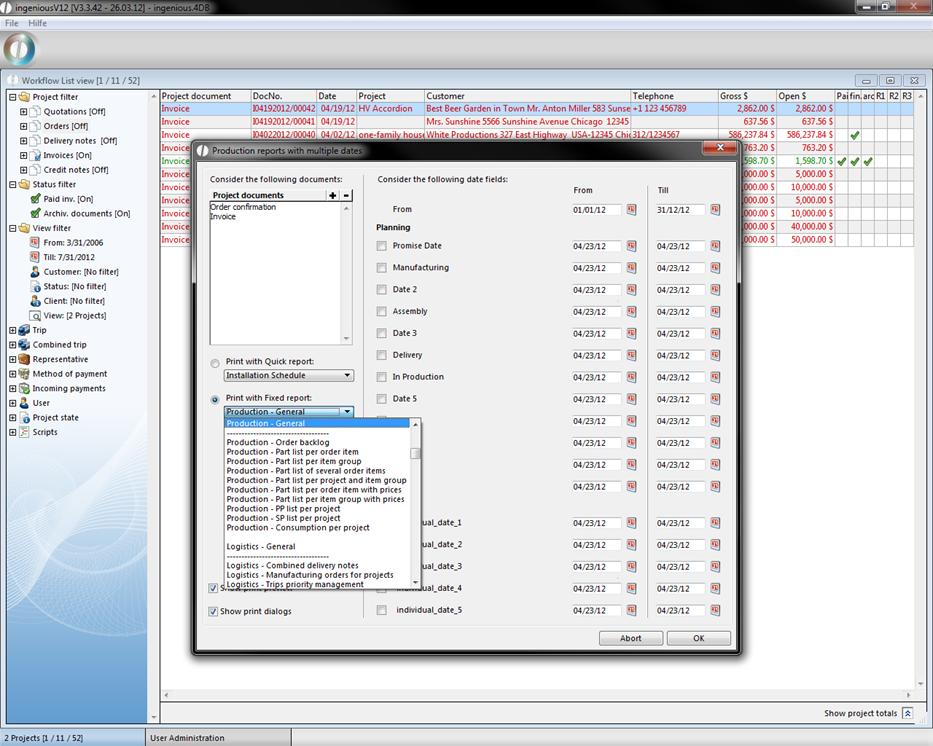
The generic print report module
The generic print report module is a flexible analyze module to print out reports on the basis of the selection of different project date entries. To use this module you have to activate the corresponding report right.
Now you can find the new print report “Production – Flexible production reports using multiple dates” in the workflow modules in the print menu.

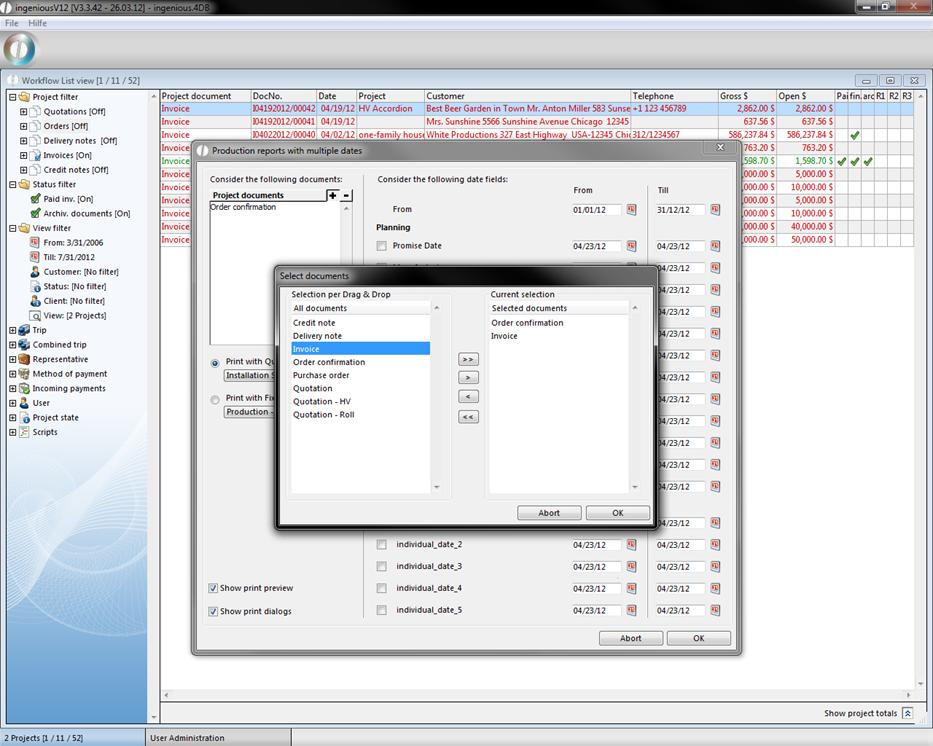
In the upper left area you can determine the project documents that will be involved in the score.
New project documents can be added by clicking the button ![]() . In the new window you can drag and drop the desired documents in the right area and accept it with “ok”.
. In the new window you can drag and drop the desired documents in the right area and accept it with “ok”.
With the help of the button ![]() you can delete project documents. The documents can be printed out on the basis of a quick report or a fixed report. In the fixed reports you can find all reports given by ingenious.V12.
you can delete project documents. The documents can be printed out on the basis of a quick report or a fixed report. In the fixed reports you can find all reports given by ingenious.V12.
You can create quick reports with the help of the quick report editor and add them to the list of print reports in the program settings. Note, that the type of the print report has to be “Type 3 – Quick report files *.4qr” and the report has to be attached to the corresponding module.
To be able to use the quick report you have to unlock the corresponding report right. Now the created quick report is displayed in the drop down list.
In the right area you can determine the date span within the project documents should be considered. The decisive fact is the print date in the projects.
In the category “Planning” you can determine the date span of the considered project dates. Here the dates from the category “Times” will be included.
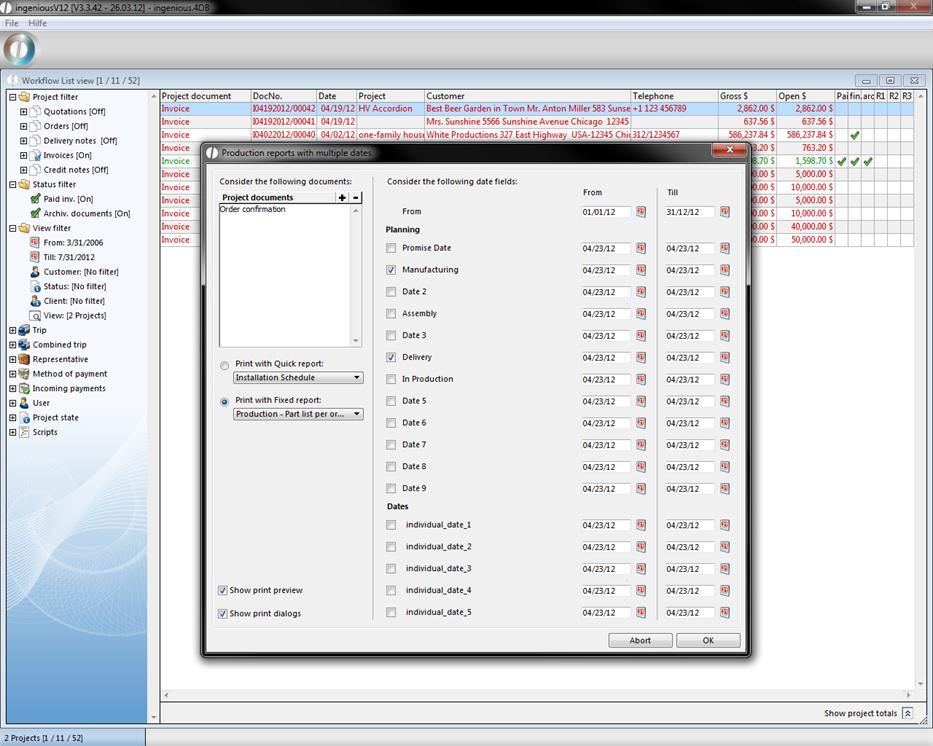
In the category “Dates” you can choose the date span for the individual dates that you can find in the projects in the category “own fields”. The print selection is chosen by the intersection of all projects having date values in the chosen ranges.